How to replace RV sewer vent caps
Sewer vent caps, also known as plumbing vent caps, are an indispensable part of your RV’s plumbing system. They let the air in the plumbing system and prevent a vacuum from forming in the pipes. That means the inside of your RV is protected from the odors from the plumbing system.
What is an RV sewer vent?
An RV sewer vent is a pipe that is installed on the roof of an RV to allow gases and odors to escape from the plumbing system. The plumbing system in an RV includes the freshwater system, the greywater system (wastewater from sinks and showers), and the black water system (toilet waste).
The sewer vent is an important part of the RV plumbing system because it allows gases to escape from the plumbing system, which helps to prevent the buildup of harmful gases inside the RV. The sewer vent also helps to equalize the pressure within the plumbing system, which helps in preventing leaks and other problems.
RV sewer vents are typically made of plastic or metal and are installed through the roof of the RV. They are designed to be durable and resistant to the elements, but over time they may become damaged or need to be replaced due to age or exposure to the elements.
What is the purpose of an RV sewer vent cap?
An RV sewer vent cap is a cap that is placed on the end of a sewer vent pipe.
It has multiple purposes:
– Helps keep debris and animals out of the sewer vent pipe
– Protects the RV’s plumbing system from various outside elements.
Sewer vent caps are typically made of durable materials such as plastic or metal and are designed to withstand the harsh conditions that an RV may encounter on the road.
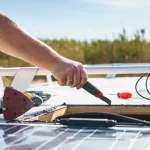
How to replace RV sewer vent caps?
If you need to replace an RV sewer vent cap, you can easily do it yourself by following these steps:
- First, locate the sewer vent pipe on the roof of your RV. It will typically be a plastic or metal pipe that sticks up from the roof.
- Use a ladder to reach the roof of your RV and locate the sewer vent cap.
- Use a screwdriver or socket wrench to remove the screws or bolts that hold the sewer vent cap in place.
- Carefully remove the old sewer vent cap from the sewer vent pipe.
- Clean the area around the sewer vent pipe to ensure that the new sewer vent cap will be able to seal properly. Use a putty knife or a scraper to remove any debris or sealant that may be present.
- Apply sealant around the base of the sewer vent cap to seal it to the sewer vent pipe. Make sure it’s a thin, even layer, and make sure it covers any existing screw holes.
- Place the new sewer vent cap on the sewer vent pipe and use the screws or bolts that came with the cap to secure it in place. Make sure that the sewer vent cap is properly aligned and tightened down securely.
15 Best RV Sewer Vent Caps
RV sewer vent caps are an essential item for any RV owner. The best RV sewer vent cap will fit neatly on the RV sewer vent pipe and create a tight seal. When choosing an RV sewer vent cap, it is also important to consider the style of cap that will best complement your RV. There are a variety of styles available, so take some time to browse the options and find the one that best suits your needs.
After 20 hours of research, we published an article about the 15 Best RV Sewer Vent Caps, check it out! It will answer all your questions about sewer vent caps and their different styles and sizes.
Remember, if you blow it with the sewer vent caps, you’ll never get rid of the smell.
Conclusion
Sewer went caps, even though small, is to be considered an important part of your RV’s plumbing system.
With these steps, you should be able to replace the RV sewer vent caps with ease and not waste money on expensive repairs.
If you have any questions, feel free to contact our experts at CheapRV, they’ll gladly answer them.


